I'll have to digress slightly at this point to acknowledge some things.
The folks who make this stuff look easy, repeatedly, are truly master crafts-people. That may be obvious to some, but for me - a habitual, sometimes recovering, scoffer - I admit it has taken a while for this to really sink in. I continue to struggle, after many months of trying, to keep things straight and neat, to work efficiently, to make sound and consistent solder joints, and to layout my circuits in a way that supports ease of assembly as well as a short signal path. Even working slowly and deliberately, completing just one task to the level quality that I'm aiming for, is a rare thing... and there are hundreds of such tasks required in succession to build a high quality piece of gear. It borders on frustrating at times, but only for a moment, and then I realize it doesn't matter how long it takes, or whether some theoretical customer would be happy with it. Mentally, I am so habituated to pursue optimization of cost (time), features, and quality, that it takes real focus to shift away from that holy trinity of commercial product development toward something more personally nourishing... the optimization of time spent with my sweetheart, enjoying the process of learning, solving, and creating, and being ever more mindful of my role and responsibilities in the family of earthly things.
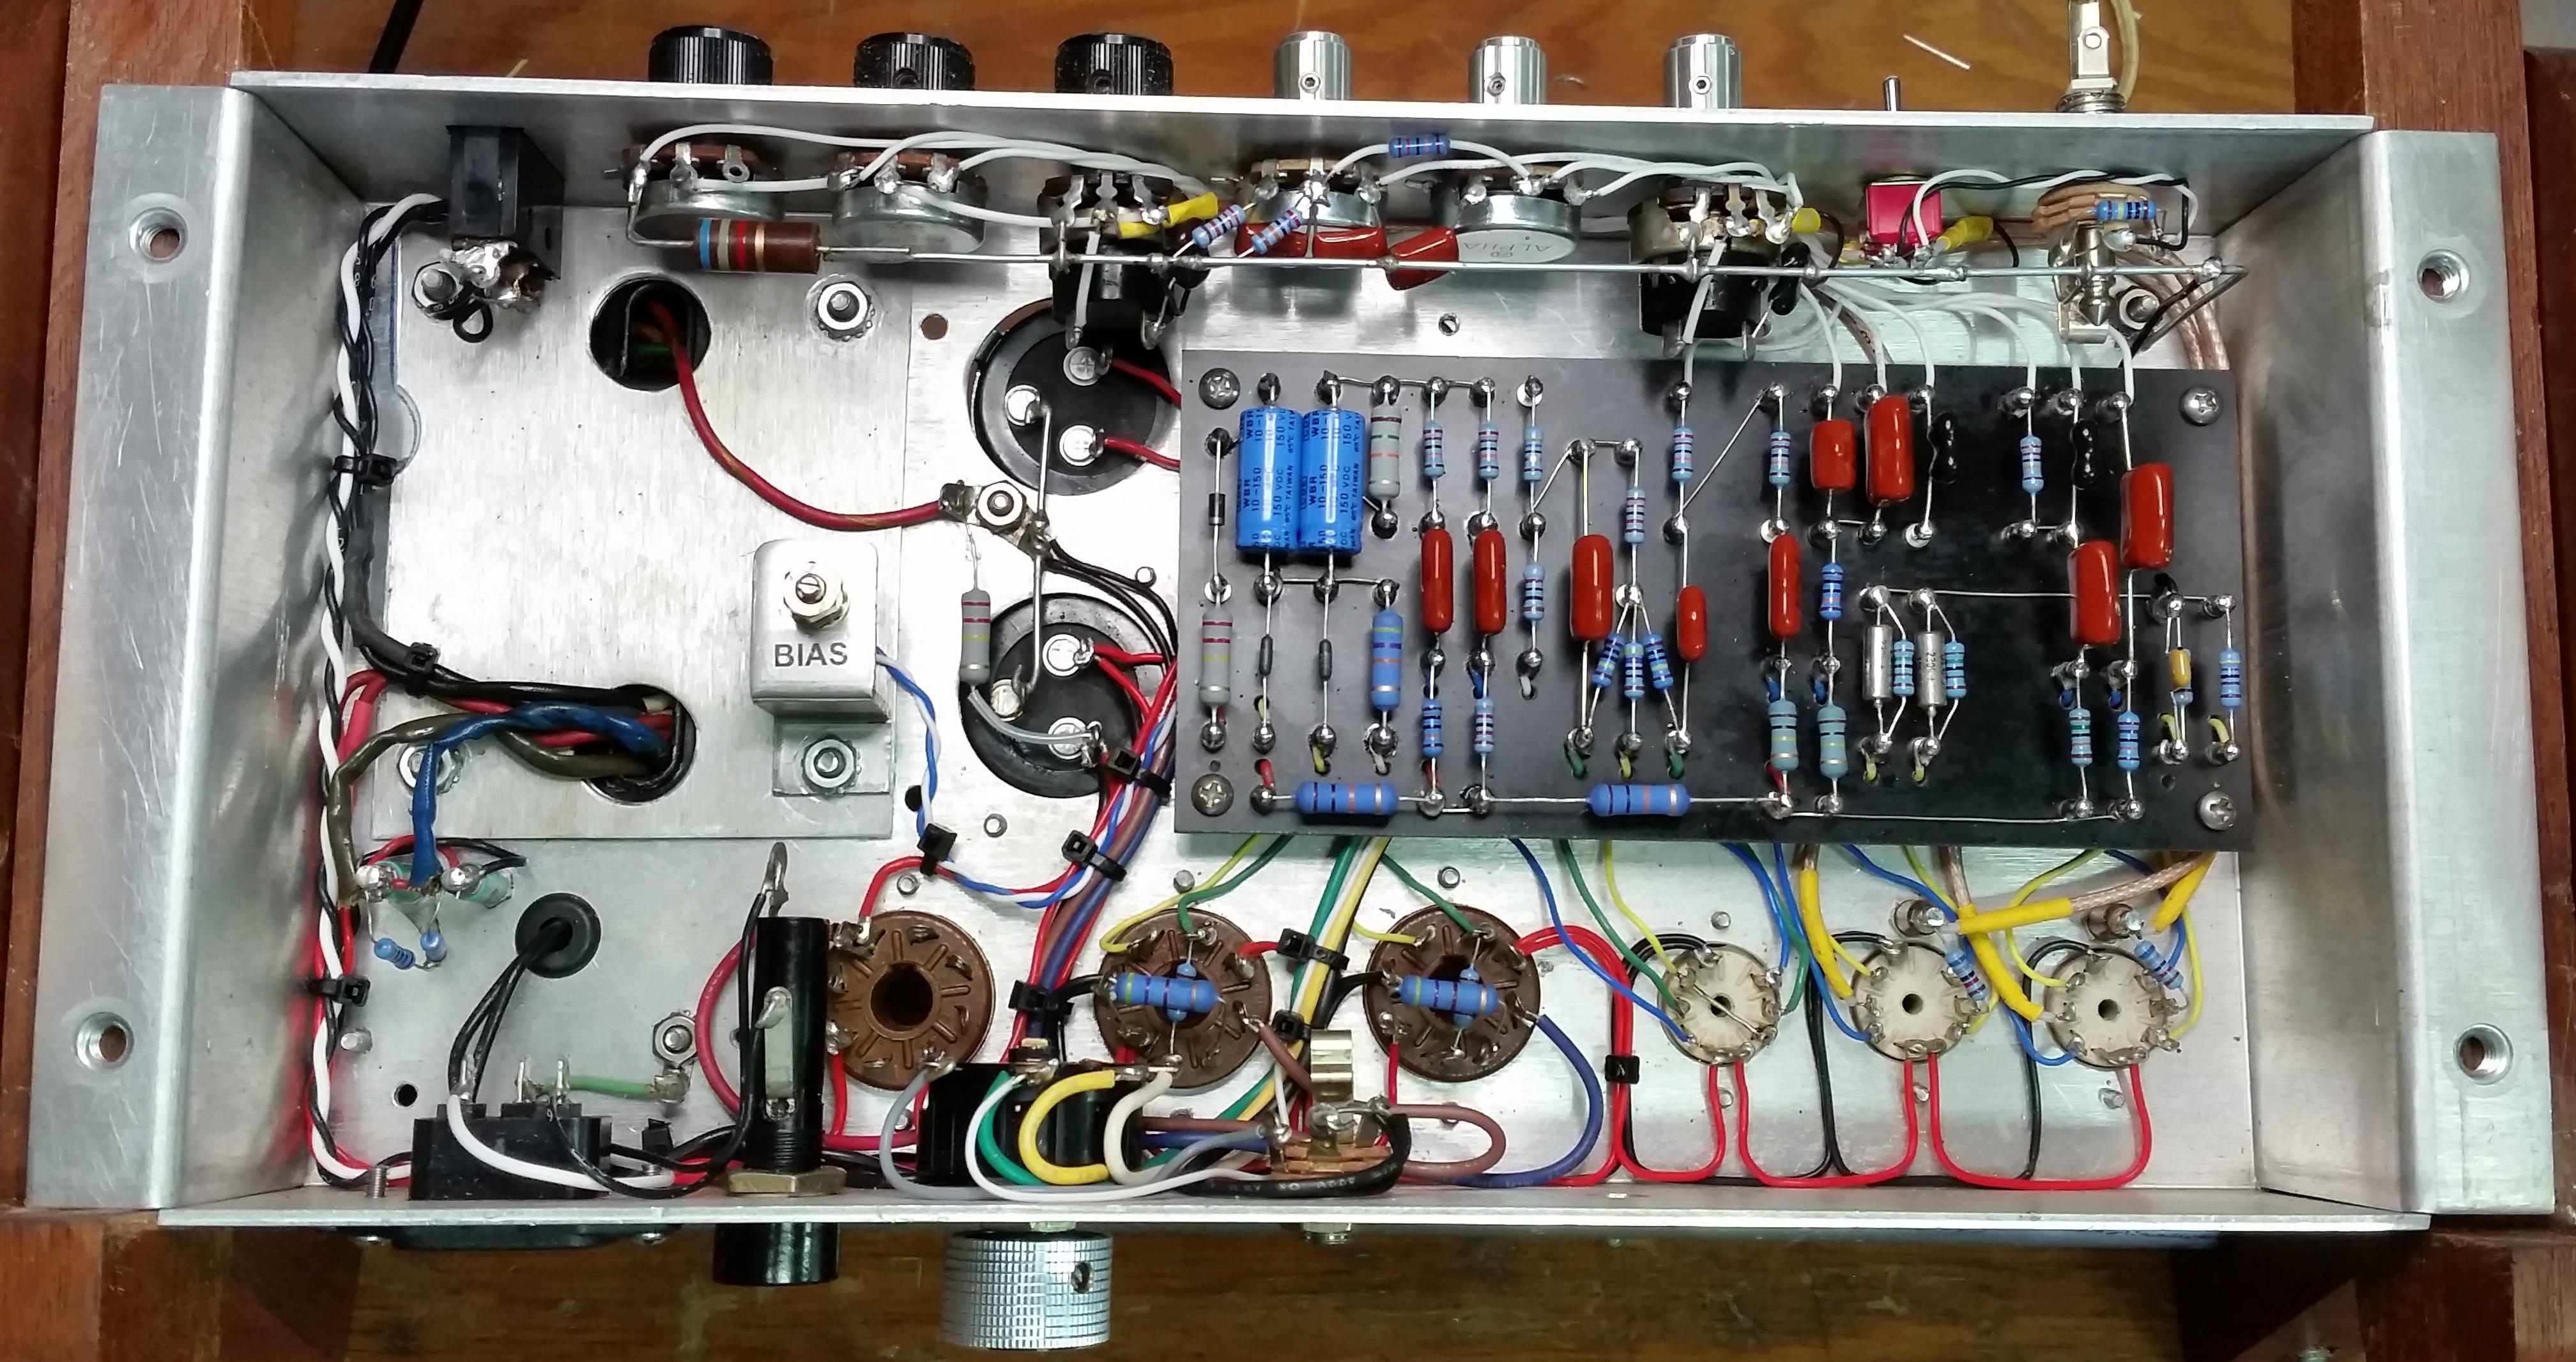
My understanding of "Lead Dress" is that refers to the concern for and execution of proper placement of wiring and components to achieve desired circuit dynamics and audio results. It isn't just precise adherence to the circuit design or the neatness of the installation, though both of those are critical for a successful build. Rather, it's a very deliberate approach to the organization and connection of parts that sounds best/right, and results in a physically robust build that is straight-forward to maintain. Making good lead dress takes a lot of practice. Here are some links to examples of solid lead dress.
(Michael's amp)
(Hoffman Blackface Deluxe)
(Trinity Tri-watt)
(Sluckey Amps All American Dual Lite)
Good looks and stage appeal, while not required, also don't hurt. It's enough to be masterful on the electronics side, but some folks are also excellent wood workers, upholsterers, and visual designers as well. Three more areas in which I know just enough to injure myself, yet lack the depth of skills and patience required to produce something of value to anyone other than myself... which gets back to the previous point regarding this whole enterprise being about process and learning and less about specific outcomes, I suppose.
So, lots of progress since last post:
Rigged up a mounting bracket and two LEDs to work with the two relays using the tiny holes already in the front panel:
Pre-wired and installed all front panel controls:
Wired the main circuit board and set components:
Installed circuit board and connected all leads to controls and sockets:
Pre-start up sequence and testing is next. Then we'll see how it sounds...